Thursday, June 30, 2022

Spotlight Technique Using Ink Blot Shop

Hello there!

It's Theary back on the blog today. I have a fun card technique to share with you today. It's my take on the spotlight technique. The spotlight technique highlights a design element on your card front, and I decided to twist it up by emphasizing the background scene. So, instead of putting color on my stamped image, I only added color to the background scene. I am leaving an untouched stamped image which I think looks fantastic.

I stamped one of the images from the Botanical Borders set from Ink Blot Shop with black ink onto a mini slim line size cardstock. The alignment guide was helpful here, as it centered my image onto the card stock without all the headache. I also stamped that same image onto masking paper.


Later, I fussy cut the image from the masking paper and placed that over the stamped image. Putting the masking paper here will help protect against the ink blending I will work on next.


After applying the masking paper to the image, I used a blending brush and blended the background scene with some dye inks. I then splattered some gold and white paint onto the card panel.


I heat embossed a sentiment from the Solid Saying set with gold embossing powder on black cardstock. I then trimmed down the sentiment into two sections.


I created a black mat behind my card front and adhered the two using liquid adhesive. Then, I adhered the sentiments using foam squares from Thermo-Web onto the front of the card panel.


I added a few iridescent embellishments here and there to finish the card and attached it to a side folding card base. And, that's it! The card is complete!


I hope you have a wonderfully blessed day!
Theary Chea


Come and visit me on INSTAGRAM and YOUTUBE


Monday, June 27, 2022

How I Swatch My Embossing Powders

Hello there!
I wanted to share a short clip of how I swatch my embossing powders. I don’t have many, but I have a few, and swatching the colors makes it easier for me to decide which one to use when I am creating. My method might not be ideal for everybody, but it works out great for me. 


The embossing swatch that I made is on white and black cardstock. That is because those are the most used colors in my craft room. You can always adjust it to your preference, though. 


I started by trimming down my cardstock to 1-inch x 8.5-inch strips. I like using my favorite paper trimmer. This trimmer is so easy to use, and it’s safer to have around my young kids, as it cuts on a roller instead of a guillotine style. 

I then adhered the black and white cardstock strips to double-sided adhesive sheets. I like the one from scrapbook.com because it’s a reasonable price and it works well. 


I then went in with my circle punch and cut out a circle, ensuring that the white and black card stock strip was evenly cut in half. You can easily see it through the bottom of the circle punch. I prefer using a circle punch over a die because I can cut lots of circles quickly without running it through my die-cutting machine multiple times. It can get tiring. 


Once I  cut out the circles, I removed one side of the adhesive backing and laid that side directly into the embossing powder I wanted to swatch. I like using a tweezer to remove the circle out of the embossing powder and use it to protect my hands during heat setting.  


After it cooled down from getting hot and melted, I applied a strong adhesive to the bottom of the circle swatch and adhered it to the base of my embossing powder container. 


I store my embossing powders upside down with the swatch on the bottom of the container. That’s because I like having the company’s label viewable when I need to reference it. But, if that doesn’t bother you, you can surely adhere to the top of the cap instead. 


And that’s it! Thanks so much for visiting! I hope you stop by my other accounts on YouTube and Instagram. 


Have a wonderfully blessed day, 
Theary Chea

Products used:


Thursday, June 23, 2022

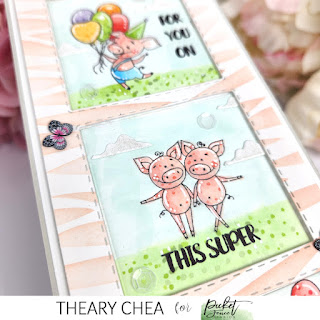
Slim Line Birthday Pigs

 Hello friends!

Today's card was so fun to make! This adorable stamp set is from Picket Fence Studios' latest release. If you haven't had time to check out the release, you can do so here.


There are so many great selections of stamps available with this release but, this one just stole my heart away. It's called When Birthday Pigs Fly. 


Here are the products that I used:


Have a wonderful day!
Theary


Saturday, June 18, 2022

Messy Art Card Featuring Ink Blot Shop

Hello there! 

I am back on the blog again today. I want to share the card I created using the no-line coloring technique for today's project.


I stamped out the paint bottle image from the Arts & Crafts Icons Stamp with light-colored ink. Then, I colored it in with alcohol markers. I wanted this card to be soft and cheery. So, I went with a pastel rainbow color palette.
I used Pixel Grid with Pixel Grid Masks Stencil for the background scene and blended a soft gray ink with my blending brush. I went heavier with the ink on the right side of the cardstock than on the left. I did this because I wanted a transitional fade effect.

Then, I used a mini slimline die and ran it through my die-cutting machine. I wanted a little bit more interest in my card panel. I later adhered all the pieces together using foam squares onto a side folding card base and stamped the sentiment from Arts & Crafts Sentiments onto the center of the card panel with another shade of gray ink.


And that pretty much completes the card! I hope you have an excellent rest of your day! Until next time!

Have a wonderfully blessed day,
Theary Chea 

My Pet Unicorn Dear

Hello there friends! 

I am so excited to be back on the blog again today. I am sharing a card I created using some great products from Picket Fence Studios' most recent release. If you guys haven’t checked it out yet, you can do so here

My three-year-old daughter inspired this card. She loves anything and everything, rainbows, and unicorns. Her absolute favorite color right now is pink!

I used the Slim Line Curvy Rainbow Die and die-cut it out of white card stock and silver glitter card stock. I then used my alcohol markers to color the rainbow stripes and inlaid each piece into the cut-out glitter paper. I also die-cut extra clouds from the die to use on my card front scene.

I used the Moving Air Stencil for the background scene and blended a soft gray ink using my Life Changing Blender Brushes

The stamped image of the princess and her unicorn is from My Pet Unicorn Dear, and this set is absolutely adorable! I had so much fun coloring the image with my alcohol markers. Of course, I decided to go with a rainbow scheme, but you can pretty much use any color palette of your choice.

The sentiment is perfect for this scene, and it’s from Princessland Dear. I stamped that down on the card front using our Black Hybrid Ink pad. I highly recommend this ink pad because it works well with different types of coloring mediums. So great with alcohol-based markers, watercolors, and color pencils. For some extra interest,  I also added a few highlights and details using a white gel pen.

I adhered everything down using a combination of liquid adhesive and foam squares onto a pink side folding card base. I love how much dimension this card has. It makes me so happy just looking at it. And, I hope that it made you smile as well. 


Until next time,

Theary Chea

Friday, June 17, 2022

Starry Night Featuring Say It With Stamps

Good morning friends!

Today, I want to share a card that I created using this adorable stamp set from PhotoPlay Paper-Say It With Stamps collection called, 'Catch A Falling Star'


The background scene was just so fun to create! I used a combination of watercolor paint and metallic watercolor paint to create the starry sky. After the card panel dried, I used the Nested Pendant Die from Say It With Stamps to create a little bit of interest. 


I then die-cut the sentiment wish from vellum and layered it onto a few wish die-cut out of black cardstock. And for the second sentiment, I heat embossed the sentiment from the Wish Stamp set in white embossing powder using embossing ink and my heat tool

To finish off the card, I adhered it to a top folding black card base. And that's it!

I hope you have a wonderful day!
Theary Chea


Tuesday, June 14, 2022

Wine Lover Shaker Card Using Picket Fence Studios June 2022 Release

 Hello hello!

Thank you for joining me on my blog today. Today is a super special day because it's the June release for Picket Fence Studios. If you haven't taken a look at the fantastic products from the release, you can do so here.

I would like to share a second card today to celebrate the occasion. This card is a fun take on a shaker card for wine lovers! If you're anything like me; I like to relax with a glass of wine at the end of the day to collect my thoughts. Better yet, a MEGAPINT!! (I'm just kidding!)


I created this card using some new and old products from Picket Fence Studios. It was so hard to get a good picture without the light reflecting on the acetate panel. Trust me when I say that this card looks so much better in person. The light hits all of the gold, and the sequins mix so beautifully. 

The background scene was created using the Oh, Don't Wine stamp, which I colored in with alcohol markers. The sentiment from Just Wanna Have Wine set was stamped on with clear embossing ink and heat embossed with gold embossing powder onto a heat-resistant acetate sheet. The beautiful sequins mix is also from Picket Fence Studios.


I hope you guys were able to snag some products from this release! It is amazing!

Until next time! Have a wonderfully blessed day!


Picket Fence Studios June 2022 Release- Princessland Dear

 Hello dear friends!

Thank you for joining me on the blog today. I am so excited to share the latest release from Picket Fence Studios.

This release is fantastic. I love all the stamps and dies and couldn’t help myself with all the inspiration that flowed through my mind. If you haven’t checked out the release, you can do so here.

For the first card, I want to share an almost one layered card using the stamp set called Princessland Dear. This stamp set is great because you can do so many different scenes with it. I used the masking technique and created a nighttime scene with just the castle and the dragon. I was inspired by my love for the infamous show, The Games of Throne.


The background scene was created by masking off some of the stamped images using my favorite masking paper. Then I went in with my PFS Life Changing Blender Brushes and a few good inks from Catherine Pooler. I also went in and splattered some white paint onto the background scene. And after the paint had dried,  I colored all the images with alcohol markers.


For the sentiment, I heat embossed with white embossing powder on black card stock and trimmed it down to a ribbon end.

I adhered everything down using foam squares and liquid adhesive.

And that completes the card! I hope you have a beautiful day!

P.S. There's a GIVEAWAY with the release! 

To enter the June Giveaway people must:
-Follow the PFS IG account and/or subscribe PFS YT channel.
-Leave a comment on the YT video release from Lisa.
-And/or leave a comment at the video release on IG.

Winners will be randomly chosen from comments left at Lisa's video release and video release from IG.
Winners will be announced on June 20th on an IG post.


Until next time,

Theary Chea.

Gladiola Blossom and Leaves Featuring Memory Box

 Hello there, It's Theary here. I'm back on the blog. Today, I want to share a card I created for a dear friend using the beautiful ...