Saturday, January 29, 2022

Valentine's Gnomes Featuring Not 2 Shabby

 Happy Saturday friends!

I wanted to share this card that I created using a stamp set from Not 2 Shabby Shop. This stamp set was included in the box of the month kit and I believe has now been sold out. =( 

Although, the stamp set has sold out; you can use the techniques that I used to create this card with whatever you may have in your stash. 


Here is a close-up look of the card. 
I had such a hard time capturing the sparkle and shimmer on the hearts in the background. It looks so much better in person and it was so easy to achieve. 


You can view the full tutorial video down below to get more information on how I created this card. 

I hope you have a wonderfully blessed weekend! 
Until next time,
Theary ❤


Thursday, January 27, 2022

Just A Note Ft. Ink Blot Shop - FAT CATS

Hello there crafters! 

I am so excited to share my first project as a member of the Ink Blot Shop Design Team.

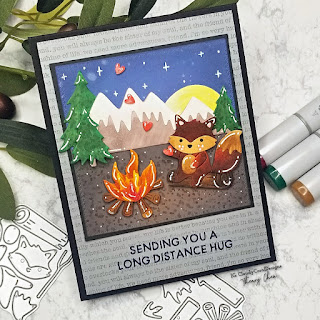
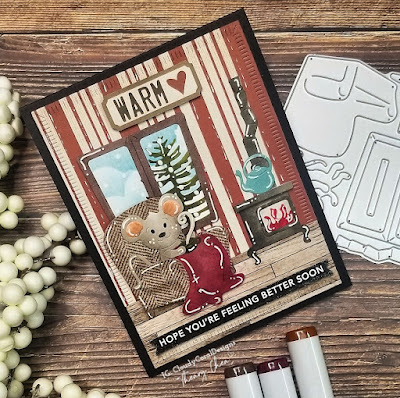
Being an animal lover, I am immediately drawn to anything that has to do with critters. And this adorable stamp set called "Fat Cats" was no exception. Yes, you read that correctly. Tifany nailed it with the name on this set; I mean, who doesn't love a chubby sweet cat. I know I do! 

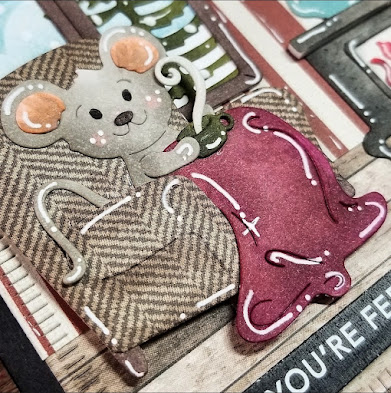
To start my project, I stamped out the images of the cats all over a white alcohol-friendly cardstock that measures 4.25 inches by 5.50 inches. I then went in and colored the images with Copic markers. I like using several shades for each cat to create dimension. So, going in with a light tone, mid-tone, and dark tone. 

Copic markers used :

W00, W0, W1, W2, W3, W5, W6, W8

R02, R12, R22, RV42

E59, E29, E39, E35, E53

YR23, YR24, YR27

BG72

After I  colored all the cats in, I used BG72 to color the white spaces on the card panel. I then used one of my rectangles wafer die from my stash and ran the colored card panel through my die-cutting machine. 

I have been enjoying adding a matted layer onto my cards lately. So, I cut down a black cardstock with my paper trimmer slightly larger than my card panel and used that to layer between the colored card panel and the white card base. 


After assembling all the pieces, I used a sentiment from Solid Saying Stamp Set, and heat embossed that with white embossing powder. I later trimmed the sentiment down to a strip and adhered that with foam strips onto the bottom third of my card front. 

And there you have it! This card is quite simple to create and requires a lot of coloring. But, I love the therapeutic feelings of breaking out my coloring markers and just going to town. I hope that this card inspires you to sit down and create. 

Until next time,

Theary ❤


Check out the process video at Cloudy Coral Designs YouTube Channel


Monday, January 24, 2022

Valentine's Day Card Series- Monster Party Shaker Card

 Hello there friends! 

I hope that you're having a wonderful day. Today, I wanted to share a video that I created for my Valentine's Day Card Series on my YouTube Channel


This card features a Halloween stamp set from Pawsome Stamps. I like that this stamp set is so versatile. You can use it for any occasion, not just for Halloween. 


In this video, I am sharing how I turned this Halloween Stamp Set into a Valentine's Day shaker card.
To get more information and see the process, you can check out the video here. 


Thank you for stopping by,
Theary ❤

Sunday, January 16, 2022

Sending You A Long Distance Hug

 Hello there, friends! It's Theary Chea here again on the blog. For today's post, I wanted to share a card that I created using some products from the Campin' Out Black Friday Release. 

This release has to be one of my favorites. I love everything about nature and being outdoors, so this card that I created was inspired by my love for mother nature.


For more information on how I created this card, please check out the video here.


Until next time,

Feel Better Card Featuring Winter Mouse From CottageCutz

 Hello friends! It's Theary here; first of all, I want to wish each one of you a Happy New Year! I hope you all had a wonderful holiday season. 


For my first blog post of the year, I wanted to share a video tutorial featuring some fabulous dies from the new CottageCutz Winter Release


This card gives me all the feel! With it being flu season, many of us feel under the weather. This card is perfect for sending to someone you love.


For this card, I used Winter Mouse by Woodstove die along with Winter Pine & Birch Tress die. Added some patterned paper, ink blending, and Copic coloring made the card come to life. 

 Please join me here to see how this "Feel Better" card came together.

I hope to see you there!
 Theary 

Gladiola Blossom and Leaves Featuring Memory Box

 Hello there, It's Theary here. I'm back on the blog. Today, I want to share a card I created for a dear friend using the beautiful ...