Hello there friends! I hope that you are having a blessed day! I am back on the blog to share a cute and simple congratulations card that I created using the Botanical Borders Stamp Set and Scripty Sayings Stamp Set.
Friday, February 25, 2022
Clean and Simple Card Featuring Ink Blot Shop
Thursday, February 10, 2022
Clean and Simple Rainbow Card Featuring Ink Blot Shop
Hello friends!
It’s Theary here back on the blog today. I hope that this week has been treating you well. I wanted to share a card I created using the Bubble Words and Arts & Crafts Icon Stamp Sets for today’s project.
I started my project with an alcohol-friendly card stock that I cut to 4.25 inches by 5.50 inches. This card requires some masking to help create a scene of the paintbrush painting out the word “Hello.” So, to do this, I needed to mask off parts of the paintbrush. I used my Misti to stamp the paintbrush from the stamp set, Arts & Crafts Icon, onto the white card panel and onto masking paper. I then fussy cut the image out of the masking paper and placed it over the stamped paintbrush on the white card panel.
Next, I stamped the hello sentiment from Bubble Words Stamp Set with alcohol-friendly ink. Then I removed the masking paper and colored all stamped images in with Copic markers. I wanted to keep this card simple with a pop of color, so I thought using a rainbow color palette seemed most fitting.
After coloring the card panel, I used one of my rectangles die from my stash and die cut the card panel using my die cutting machine. I then adhered the card front to a gray-colored card stock that I trimmed slightly larger than my card panel and mounted that onto a top folding card base with foam tape.
I used my shimmer marker and applied sparkle to the sentiment to add more interest to this card. The matching envelope was easy to come together too. I used white pigment ink and stamped the hello sentiment with the Bubble Words Stamp Set. The stamp set also includes heart images that I also used on the envelope.
And there you have it; the card is now complete. I hope you enjoyed this tutorial and discovered something new. Until next time, I hope you have a beautifully blessed day!
You can check out the full tutorial video here:
Monday, February 7, 2022
Create Movement! Interactive Card Featuring Playful Pandas from Pawsome Stamps
Hello everyone!
I hope that you are having a great weekend. Today, I am sharing a card that I created using a stamp set from Pawsome Stamps call Playful Pandas.
Saturday, February 5, 2022
Always & Forever Card featuring My Favorite Things
Hello there friends!
I hope that you're having a wonderful day. For today's post, I wanted to share a card that I created for my YouTube Valentine's Day Card Series.
Wednesday, February 2, 2022
Wishing You A Beautiful Day Ft. CottageCutz
Tuesday, February 1, 2022
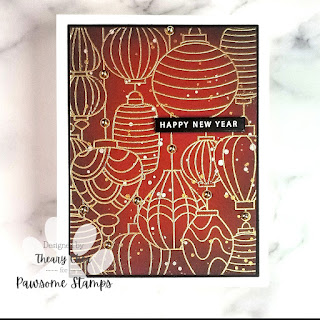
Happy Lunar New Year!
Hello there friends!
Today, I wanted to share a special card that I created for Lunar New Year.
It's been hard finding a stamp set for Lunar New Year but, I found this great background stamp set from Pawsome Stamps' newest release.
Gladiola Blossom and Leaves Featuring Memory Box
Hello there, It's Theary here. I'm back on the blog. Today, I want to share a card I created for a dear friend using the beautiful ...
-
Hello friends! It's an exciting day! It's release day for Ink Blot Shop! YAY!!!! I can't express the excitement that I have for...
-
Hello there! Today, I am sharing a card I created using fantastic products from the Magnolia collection by Memory Box Co. I started by die...
-
Hello, thank you so much for joining me. Today, I want to share a one-layered card I created using some fantastic products from Trinity Stam...


.jpg)
